October 19, 2013
 |
| My original drawing laying out the set's dimensions. |
 |
Made out of plywood, the wall is cut, primed
and assembled onto a wooden frame. |
 |
| The seams are filled with drywall compound and tape. |
 |
| I used drywall compound again to add random patches of decay which I then stippled with a sponge. I also added support beams made of 2x2's for both practical and aesthetic reasons. |
 |
The wall was painted by brush and sponge
using only 4 colours. Brown, black, tan and green. |
 |
| Isaac is placed on the set to help show its scale. |
 |
Significant detailing is added. Dowels, foam core, hot glue
and paint are basically the only supplies used. |
 |
A very basic 3 point lighting set up with no gels provides
a good example of the set's visual potential. |
 |
| A closer view of some of the detailing. |
 |
At this point the set is about 70% complete. It now
needs to be aged to help give it a lived in look. |
 |
| An example of how Leith might be framed in the final film. |
October 12, 2013
 |
Leith's mouth now opens evenly
after having the jaw adjusted. |
 |
The side of Leith's head is missing some detail
around the ear piece. A patch will be used to repair this area. |
 |
| A patch of liquid latex dries in the mould. |
 |
| The dried patch is removed from the mould. |
 |
| The patch is glued in place using liquid latex. |
 |
An additional piece was sculpted for the base of the neck.
This will hide the tie down and give the head a little more weight. |
 |
| The mould for the neck piece is filled with liquid latex. |
 |
| The finished neck piece released from the mould. |
 |
The puppet head with its new neck piece. When painted,
it will appear to be a natural extension of the neck. |
October 5, 2013
 |
The new Leith facial armature. It is a little
more streamline than the first version. |
 |
| The cracked mould after being repaired. |
 |
| The Leith mould in the oven. |
 |
| The mould cools after its 3 hour bake. |
 |
The back half of the mould is pulled away
revealing the puppet within. |
 |
| The completed puppet is pulled from the mould. |
 |
| Placed side by side, the differences between the two puppets appear minimal. The discoloured areas on the first puppet are where I injected liquid rubber to fill in air pockets. |
 |
Fully trimmed, the new puppet is ready for some
minor patching before being painted. |
October 3, 2013
 |
The facial armature for the Leith puppet.
|
 |
Everything is ready for foam run number 4.
|
 |
My foam running log.
|
 |
The Leith mould is filled with fresh, uncured foam rubber.
|
 |
The back up puppet for Isaac is ready for the oven.
|
 |
The two moulds in the oven and ready for baking.
|
 |
The back of the foamed up Leith puppet.
Above the head you can see the mould which split during baking.
|
 |
The front half of the Leith puppet.
|
 |
| Although it looks good on the outside, there are a number of internal issues which will necessitate a second run. |
 |
The back of the Isaac back up puppet looks
good coming out of the mould.
|
 |
| The back up puppet is successfully extracted from its mould. |
October 2, 2013
 |
Clarke's facial armature will allow
for animated mouth movements. |
 |
The 4 part GM foam latex kit
plus the mould release agent. |
 |
The foam rubber is whipped until it has
the consistency of Cool Whip. |
 |
| Clarke as he appeared fresh out of the mould. |
 |
Although there are minor imperfections, the
puppet as a whole turned out exceptionally well. |
 |
The excess foam has been trimmed. The details
from the sculpt have transferred nicely to the final puppet. |
 |
| The final puppet ready for paint. |
September 30, 2013
|
A maroon base coat is applied
as a starting point.
Even before completion I felt
the character was too dark again.
This attempt has ended up looking
very similar to my first attempt.
The dark colours fail to bring out
the character's humanity.
Clarke under dramatic lighting.
Not bad but can be better.
September 8, 2013

Clarke was initially covered in
a flesh tone coat.

The face came together very quickly.
The final look was darker than I had anticipated
which lead to changing the overall colour palette.

The body was covered in a darker base coat
of brown to match the face more closely.

After several hours of detailing the
body nears completion.

Under neutral lighting the final additions
of green and yellow can be seen.

While not a bad attempt, this look
is much too zombie like.
AUGUST 28, 2013
AUGUST 20, 2013
 |
| The puppet is ready for its retaining walls. |
 |
| Bring on the plaster. |
 |
| I'm always surprised at how fast Ultracol 30 dries. |
 |
| Half way there. |
 |
| Cleaning out the clay. |
 |
| Another successful mould. |
AUGUST 14, 2013
Clay is roughed over the skeleton of the final puppet.
Detailing begins.
Minor changes have been made and the model
begins to move toward its final look.
Under controlled lighting the detailing
can be seen more clearly.
The model was sculpted in its final position. Because it
will never be rolled over I did not bother to detail its belly
Not having a head also made the
sculpting go much faster.
AUGUST 9, 2013
 |
| Clarke is prepared moulding. |
 |
| The walls are up and ready for plaster. |
 |
| The first half of the mould dries. |
 |
The first half of the mould is done. It is flipped
and readied for the second pour. |
 |
| The second half dries. |
 |
The mould has been opened, the model removed and
any small bits of clay carefully brushed out. |
 |
You can see the fine detail that has been
retained during the moulding process.
AUGUST 1, 2013 |
 |
A slush mould of the front half of Isaac. This will be used
for testing different paint schemes |
 |
| A base coat of grey. |
 |
| My first paint test using red, gold, blue and silver. |
 |
| Not a bad start but it looks to random. |
 |
| Moving towards a more uniform colour palette. |
 |
Some weathering has been added to help give
him some character. |
 |
| Very close to a finished look. |
 |
When I saw the character under uniform lighting I
decided to change the silver areas to black. |
 |
Isaac is looking much more appealing.
JULY 11, 2013 |
 |
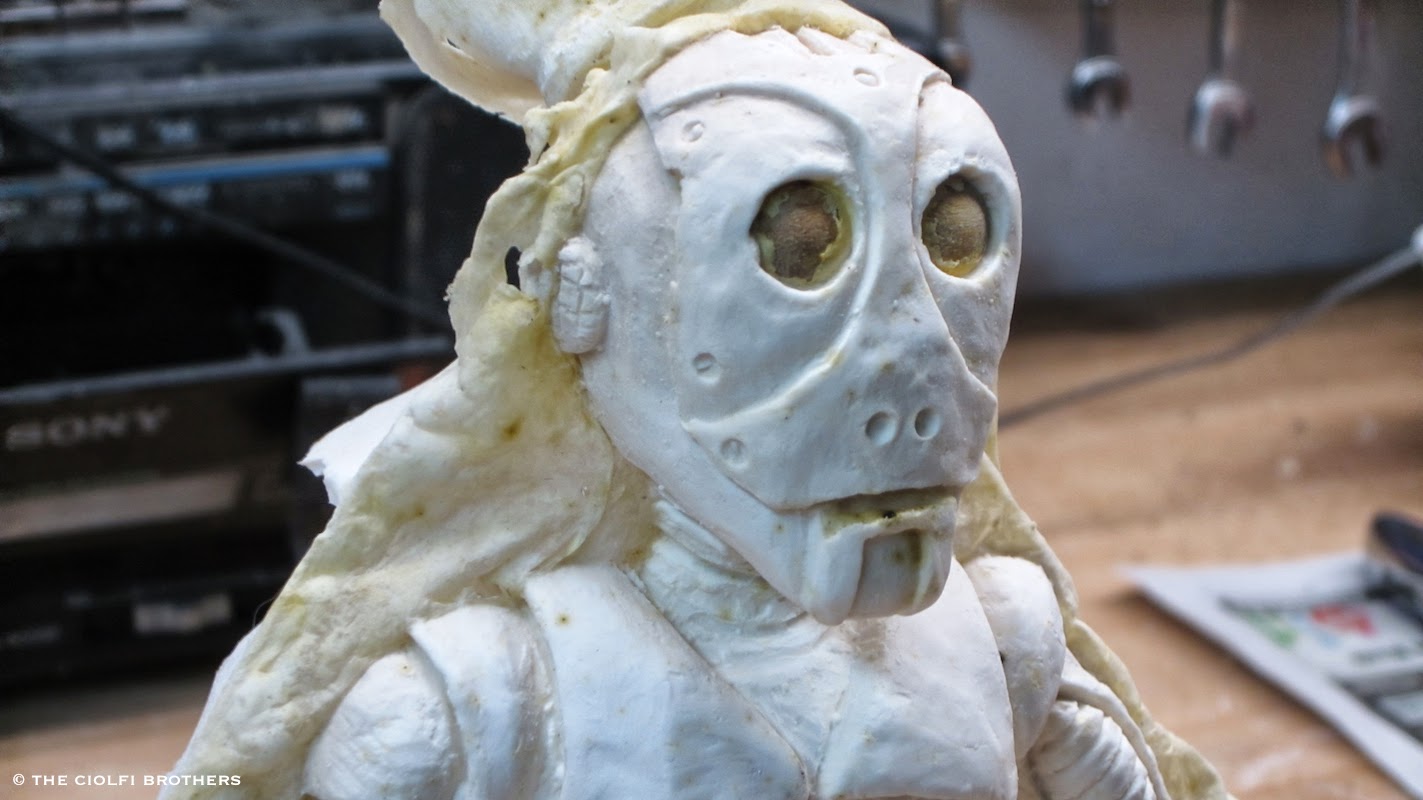
| Early sculpture of Leith. |
 |
| Leith design and the skeleton for Isaac. |
 |
| Isaac sculpture. |
 |
| Clarke sculpture. |
 |
| Clarke and Isaac. |
 |
| Leith prepared for moulding. |
 |
| Leith extracted from her final mould. |
 |
| Isaac prepared for moulding. |
 |
| The final two piece mould for Isaac. |
 |
| A liquid rubber slush casting of Leith for a paint test. |
 |
| Painted slush cast showing Leith's final look. |
 |
| An early prop design. |


No comments:
Post a Comment